Tote Bags


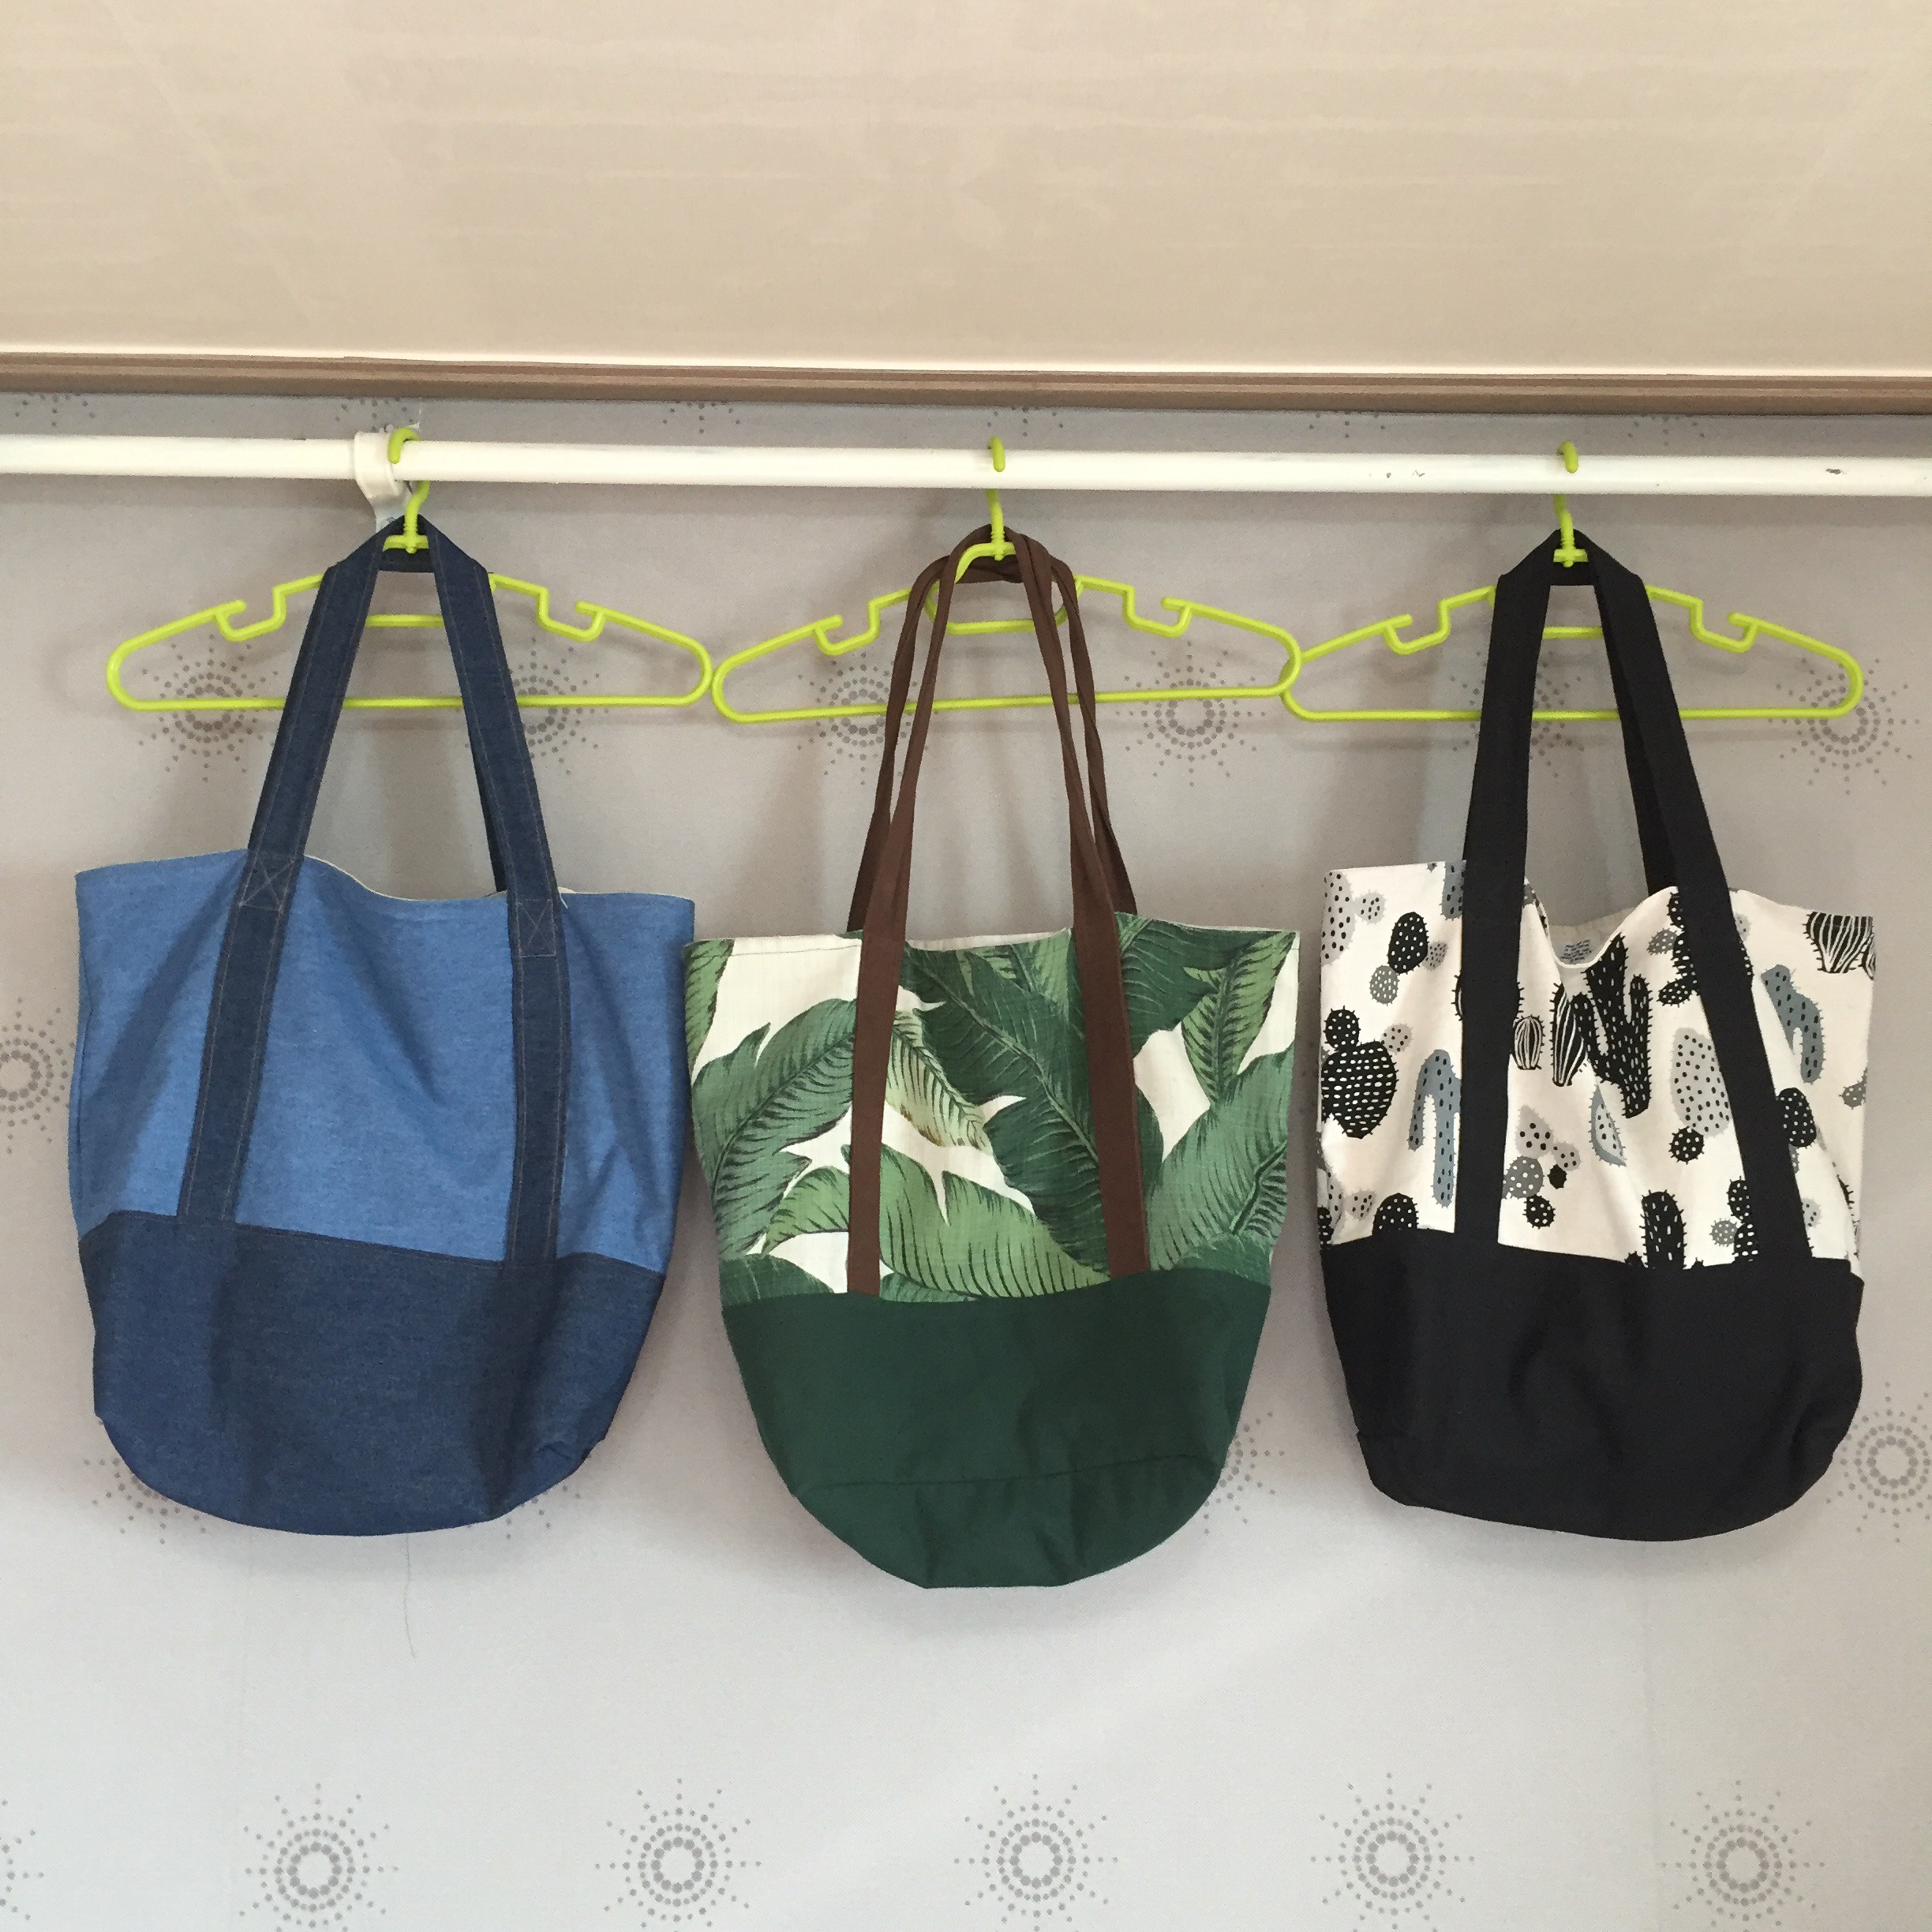
Two new bags, with one I made a while back in the middle.

I feel like tote bags are becoming my signature item. A month or so ago I made four of them, and then two days ago I finished another two. I’d started those last two before Christmas, and then left them in Australia. Now I’ve left Korea and I’m back home, so I could finally get them finished.

I absolutely love these tote bags, they’re so practical and sturdy, and leave a lot of room to play with prints. They also make great gifts. Of the eight tote bags I’ve made in total, only two of them were for me.

I won’t say too much about the construction, because I’ve already blogged about the first two I made (the leafy ones), and they’re pretty much exactly the same, except that the denim and cactus ones have slightly different dimensions. For those, they’re an inch narrower, and the base is an inch (half an inch?) shorter. The straps are also an inch shorter, because I’m a bit short and they were coming too close to dragging on the ground. I did the corners 3″ in along the bottom seams.

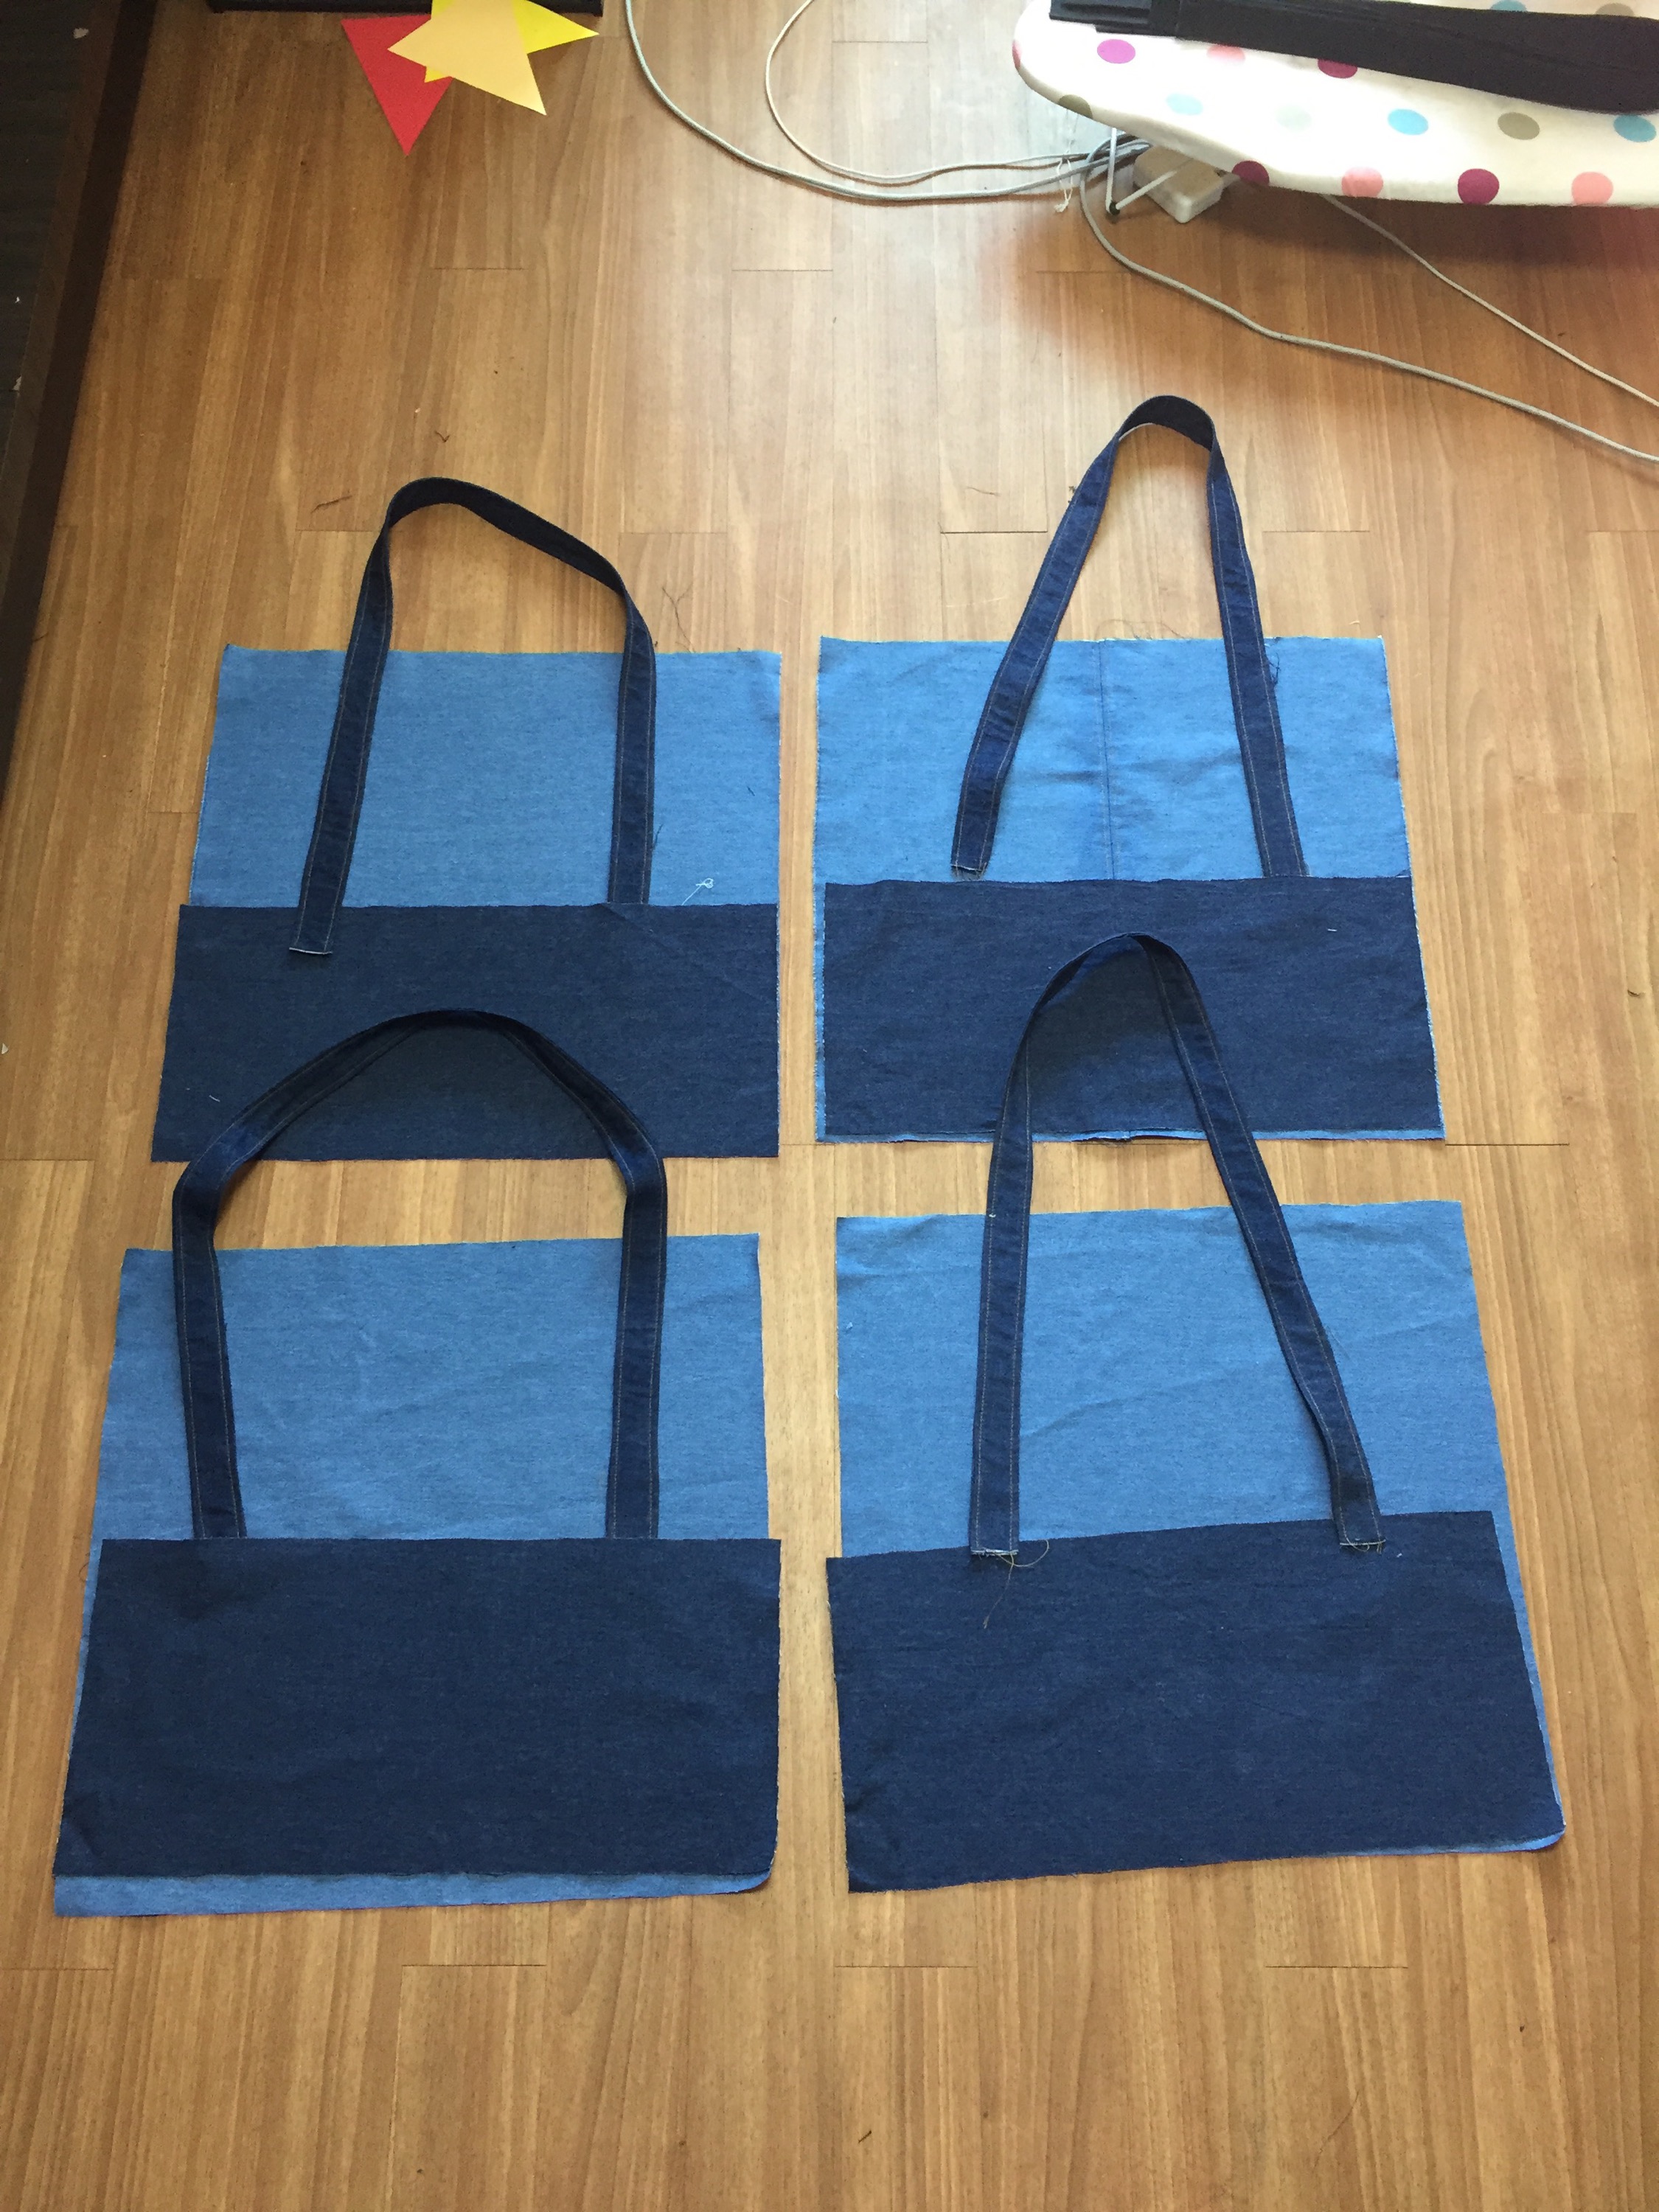
the pieces laid out for construction

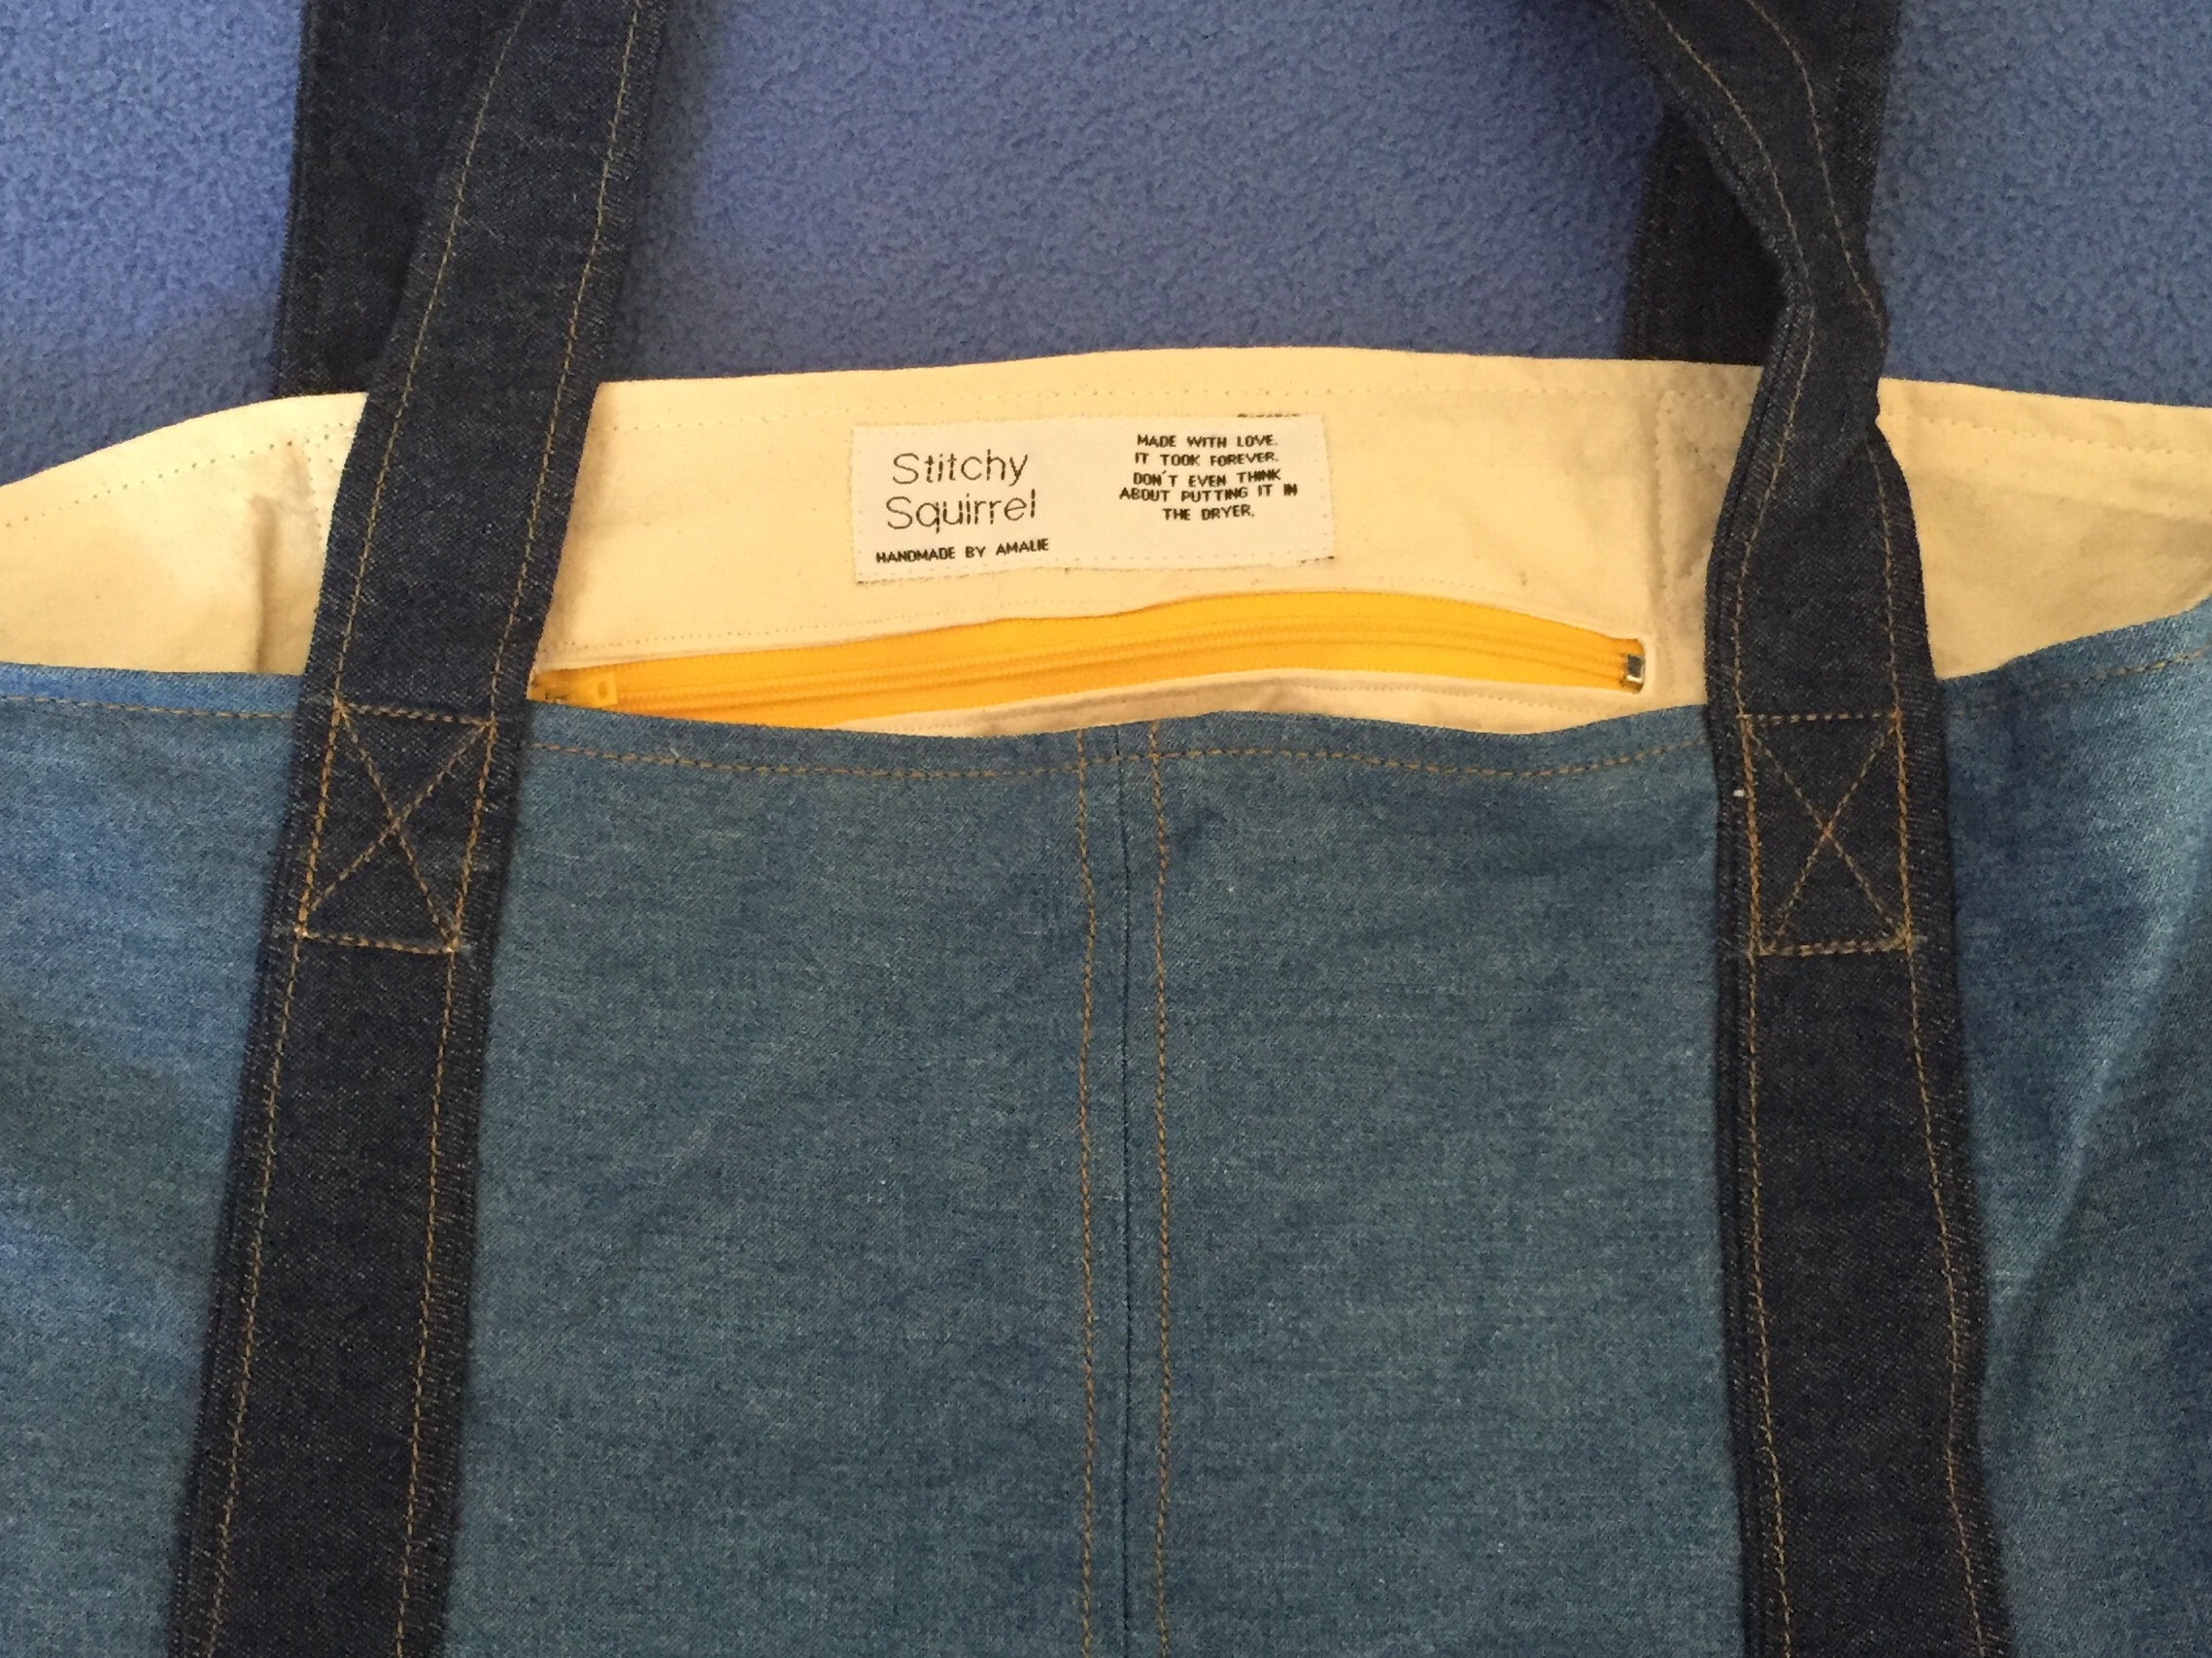
The two denim ones are for some male friends of mine. I used dark denim for the base and straps, and a lighter denim for the main body. Both bags have classic caramel-coloured top stitching. All the fabric for these is from Dongdaemun Market in Seoul.

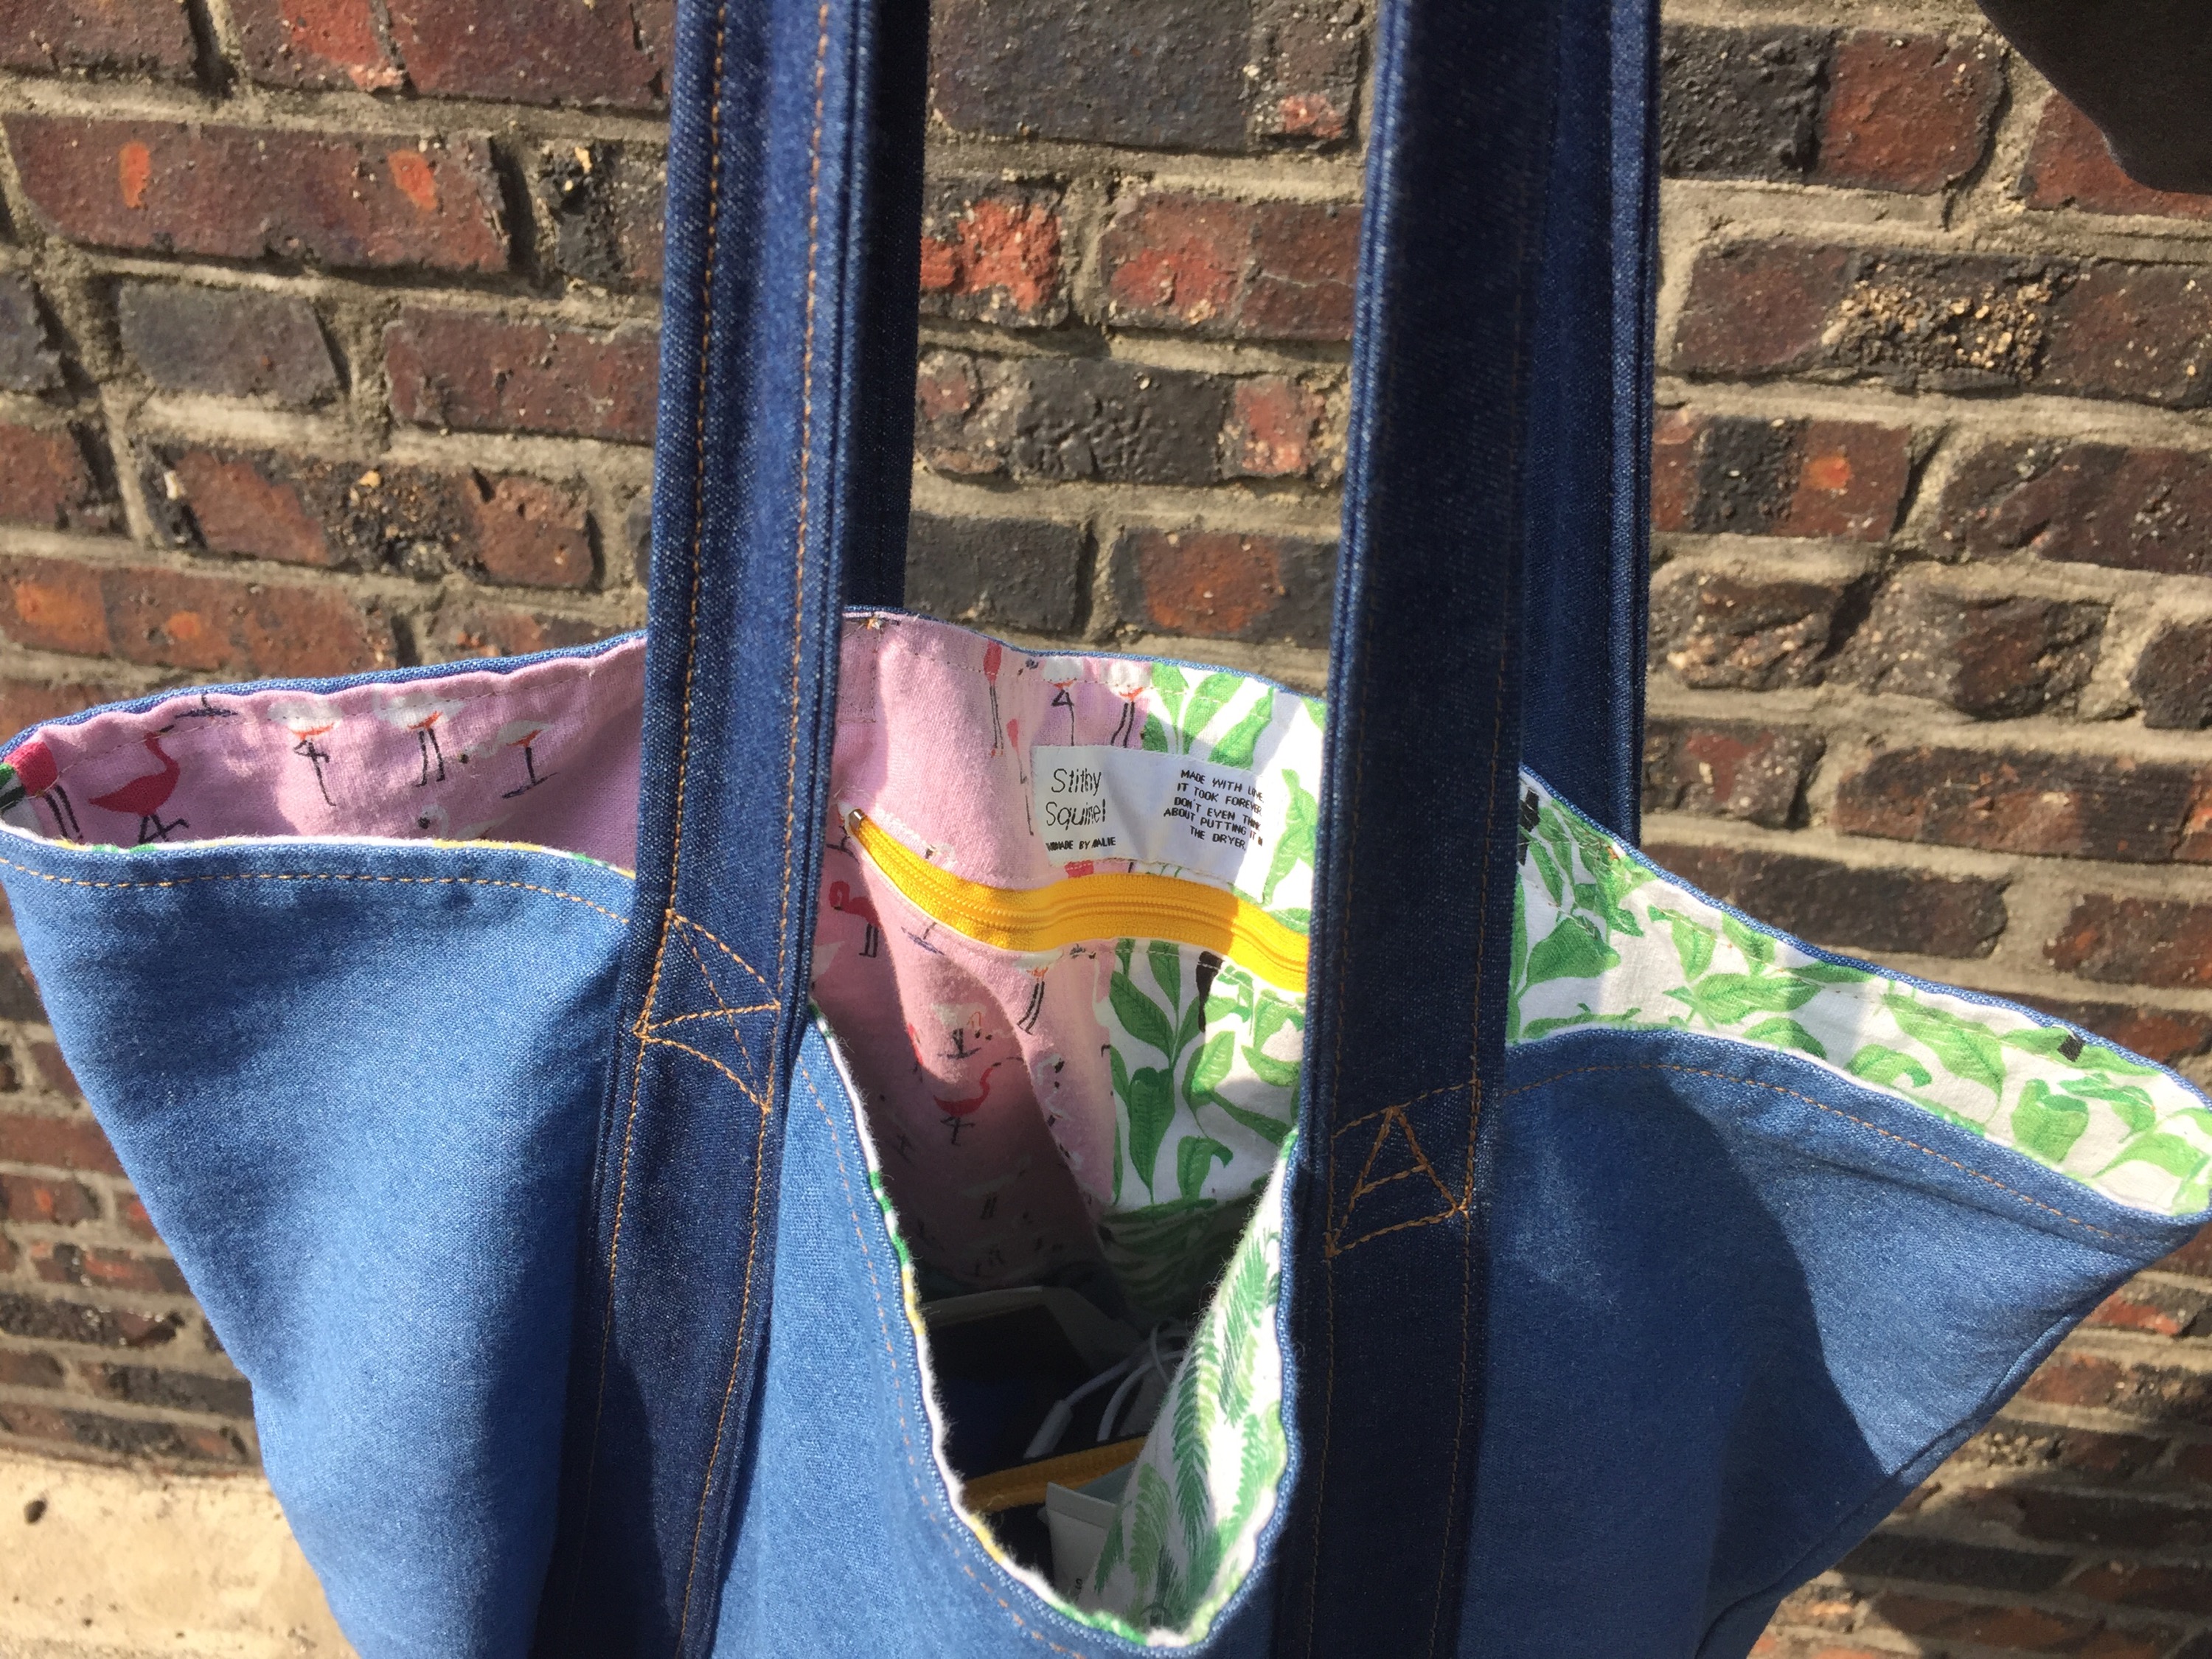
a peak at the tropical lining

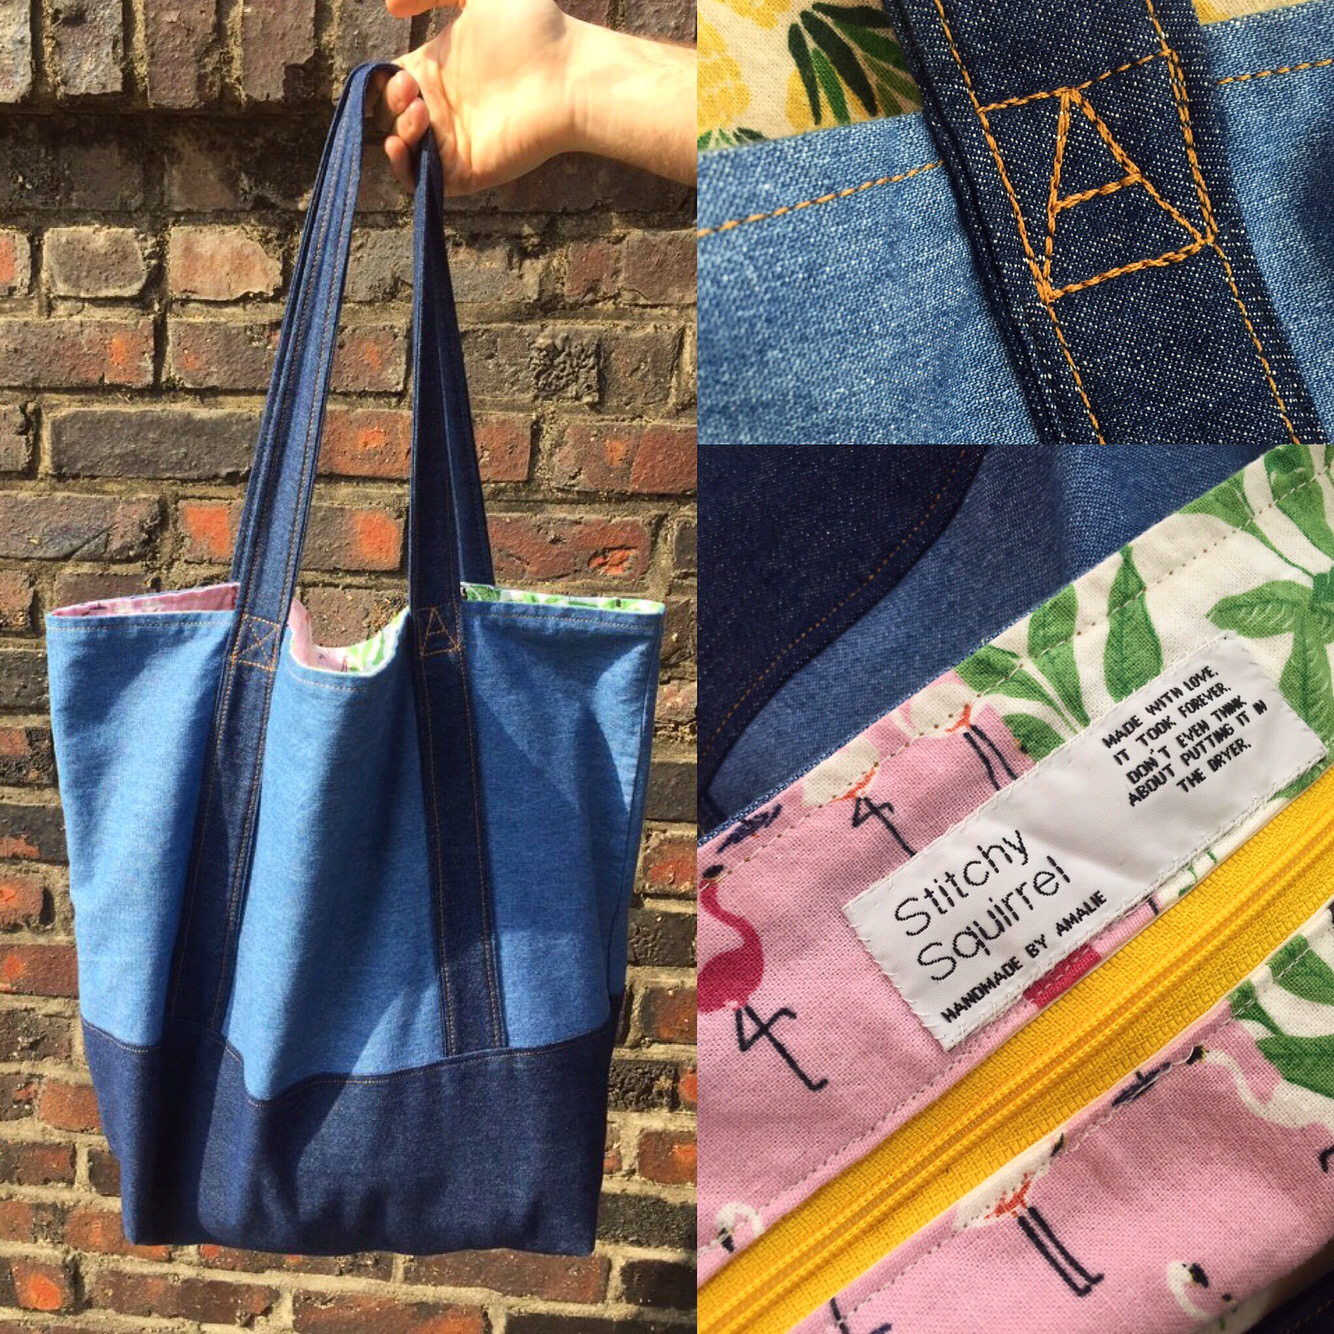
Friend A is a great artist, and I made his in exchange for a drawing. He picked out the fabrics, including the lining, which I really love. The panel piece had six squares of different tropical prints– leaves, flowers, pineapples, flamingoes. For the internal pocket, I used a yellow zipper. I usually do Xs on the straps at the top of the body, for extra strength, but on one of them I did an A for his name. A little personalized detail which makes me smile. The total effect is perfect– the bag is fairly simple and masculine on the outside, and fun and flamboyant on the inside. Just like my friend! He’s really happy with it, and takes it everywhere– huge success.

Friend B’s bag is a bit simpler, with plain unbleached canvas for the lining. It also has a yellow zipper for a little splash of color. There’s a seam down the centre of one of the main body pieces, because I didn’t have enough fabric to do it in one piece. I thought it added a bit of interest, and emphasized it with top stitching.

the bag for Friend B

When Friend A said he wanted denim on denim for his bag, it made me think of Friend B, who was infamous in uni for rocking the “Canadian Tuxedo” look. I like making these bags in pairs, so it was pretty perfect to just make another with the same main fabrics. He doesn’t know he’s getting it yet (the chances of him reading this blog are very, very low)– I hope he likes it!

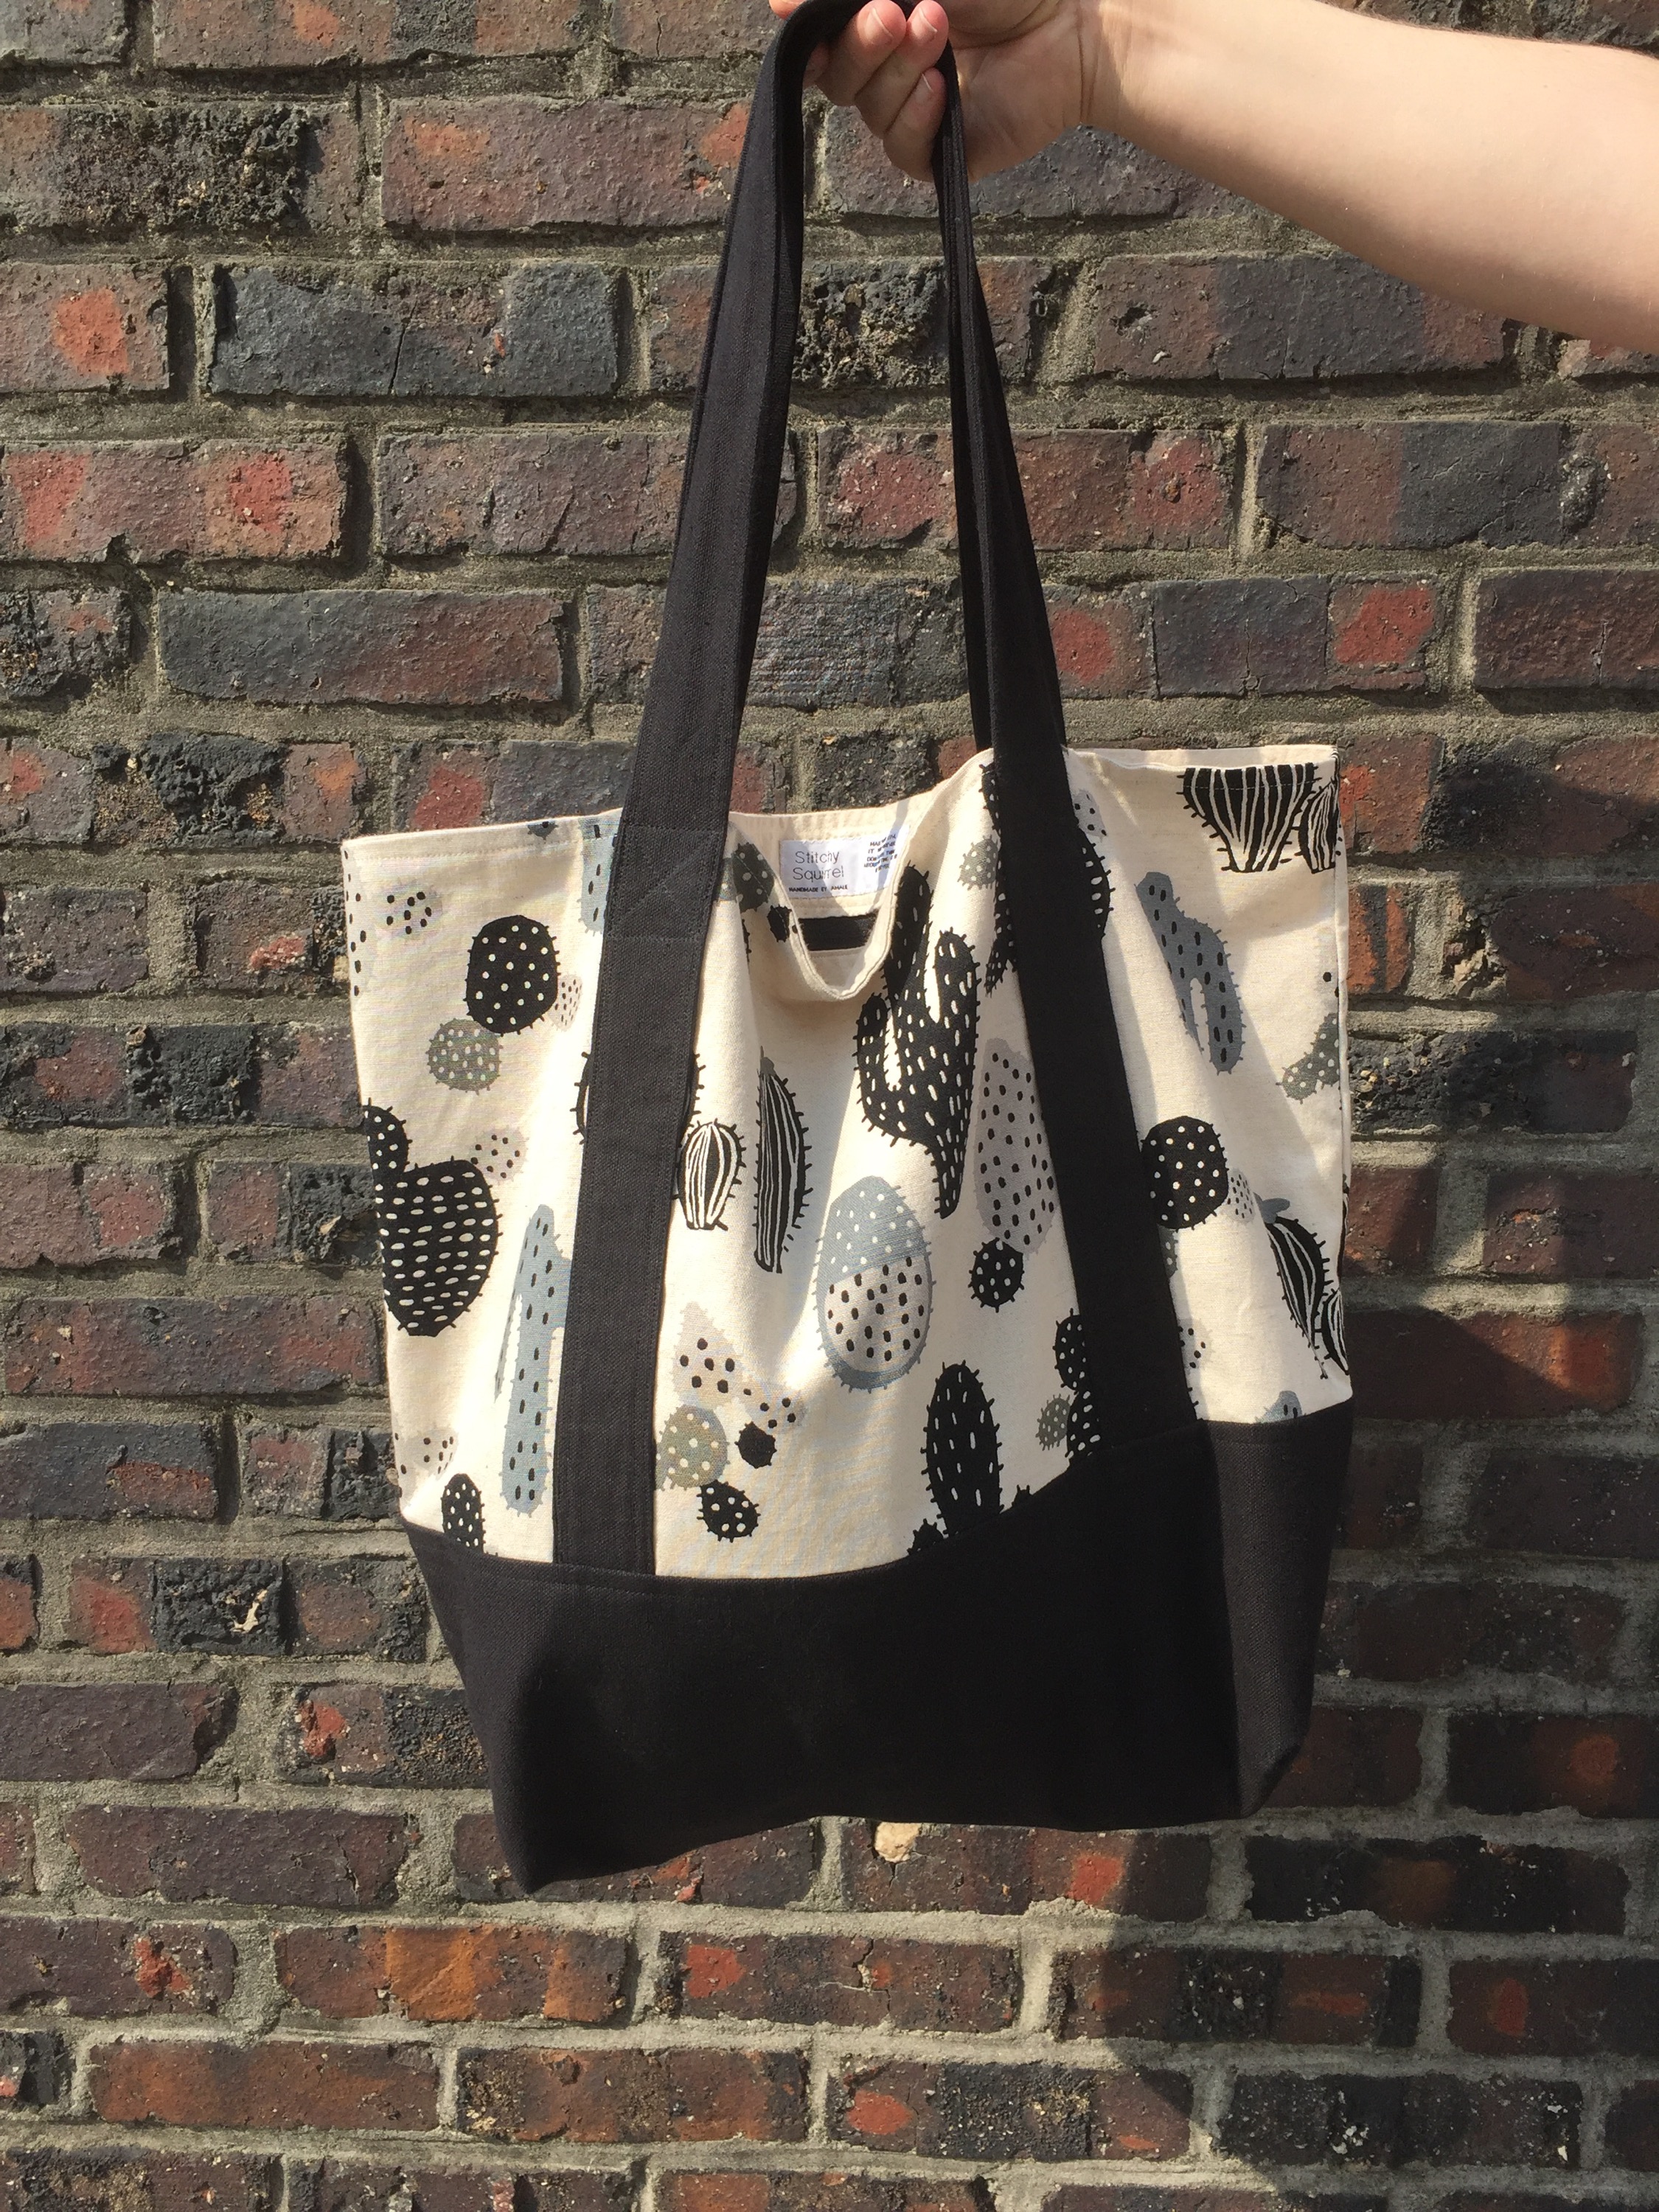
The next two I made using black 9 oz. duck canvas from fabric.com for the straps and base, and cactus print canvas from Miss Matatabi (sold out) for the main body. I made one for a close Korean friend who was so helpful to   Me while I lived there, and one for myself. They’re identical except that mine has a join on the back piece of one of the straps, because I was low on fabric. It’s not noticeable at all because it’s on the part that’s stitched down along the body. Plain unbleached canvas for the lining, and black for the zippers. My friend seemed happy with hers, and I’m very happy with mine– before, I constantly used my leafy tote, but now this is my go-to bag. The leafy tote was designed for my parents (Dad has completely taken over their one and uses it a lot!), this one feels more “me”.

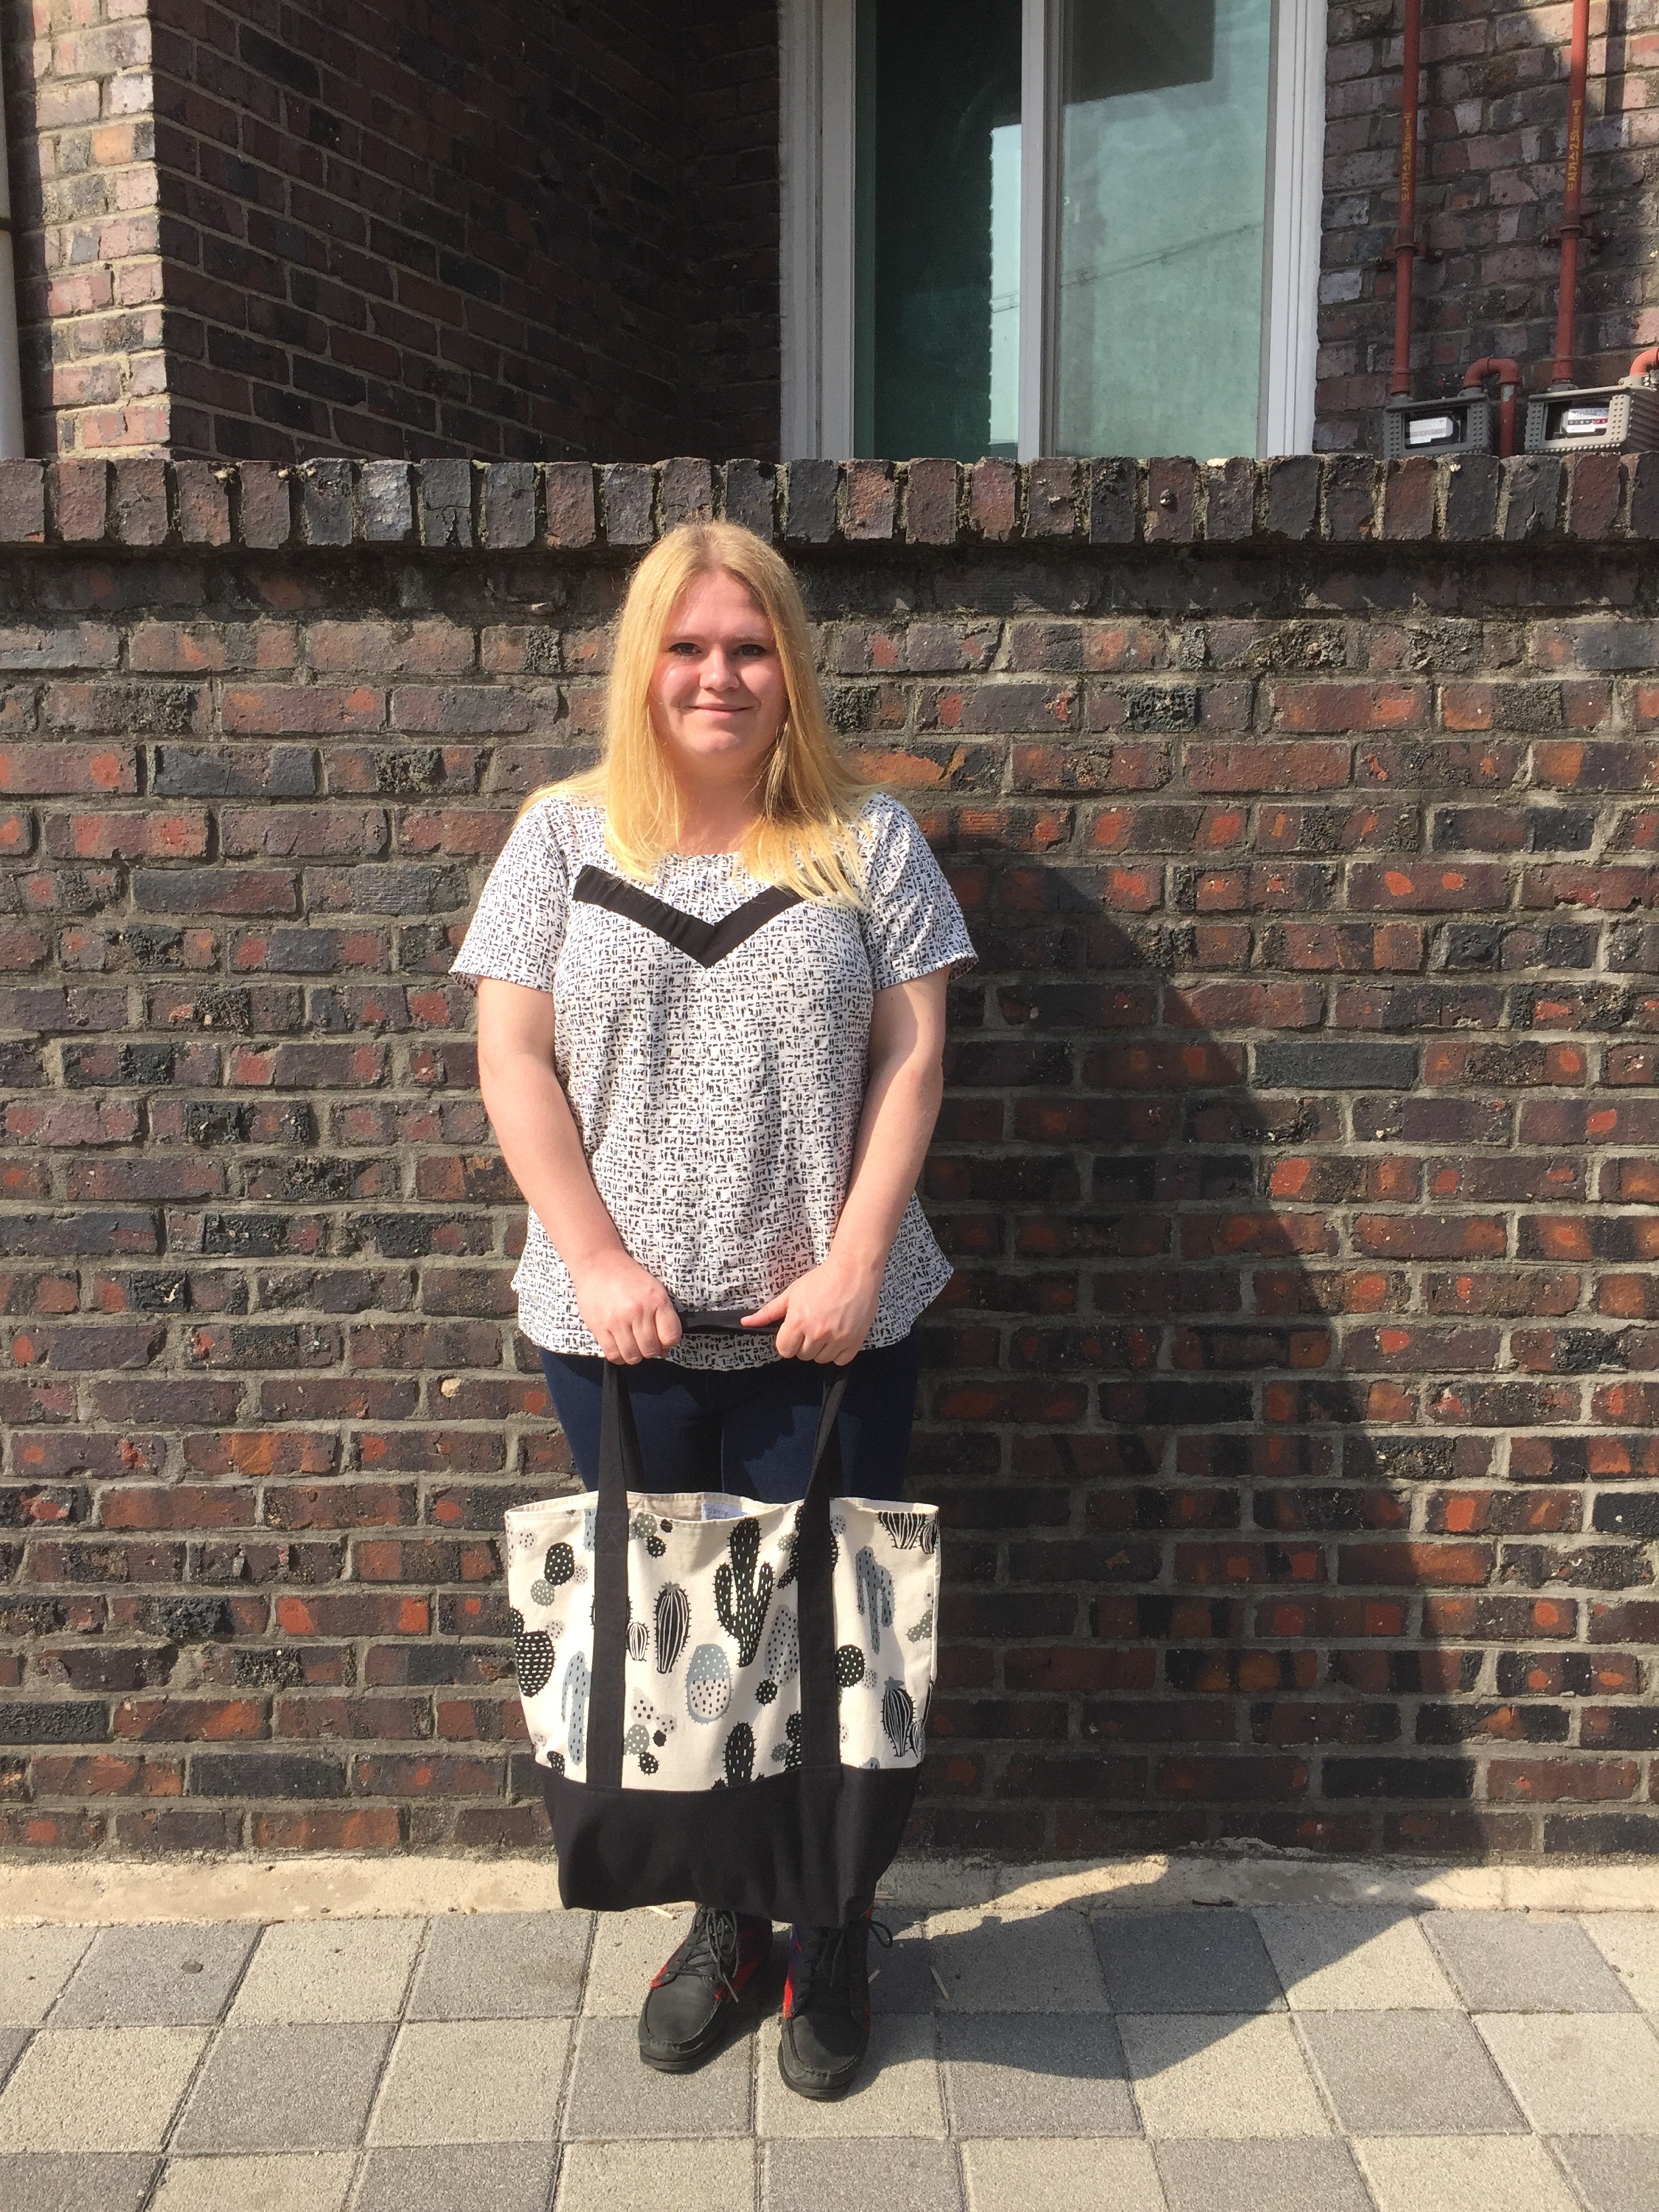
with my recently made Papercut Patterns Clover blouse

The last two totes used 7 oz. hunter green duck canvas from fabric.com for the base, 9 oz. brown duck canvas for the straps, and “Robobear” printed canvas from Miss Matatabi (sold out) for the main body. Miss Matatabi really is my favourite source for printed canvas. The lining is also unbleached canvas from the market in Seoul. These two are for my parents, to take to our family holiday house–named Bear Camp– in the California redwood forest. These were meant to be Christmas presents, but better late than never!

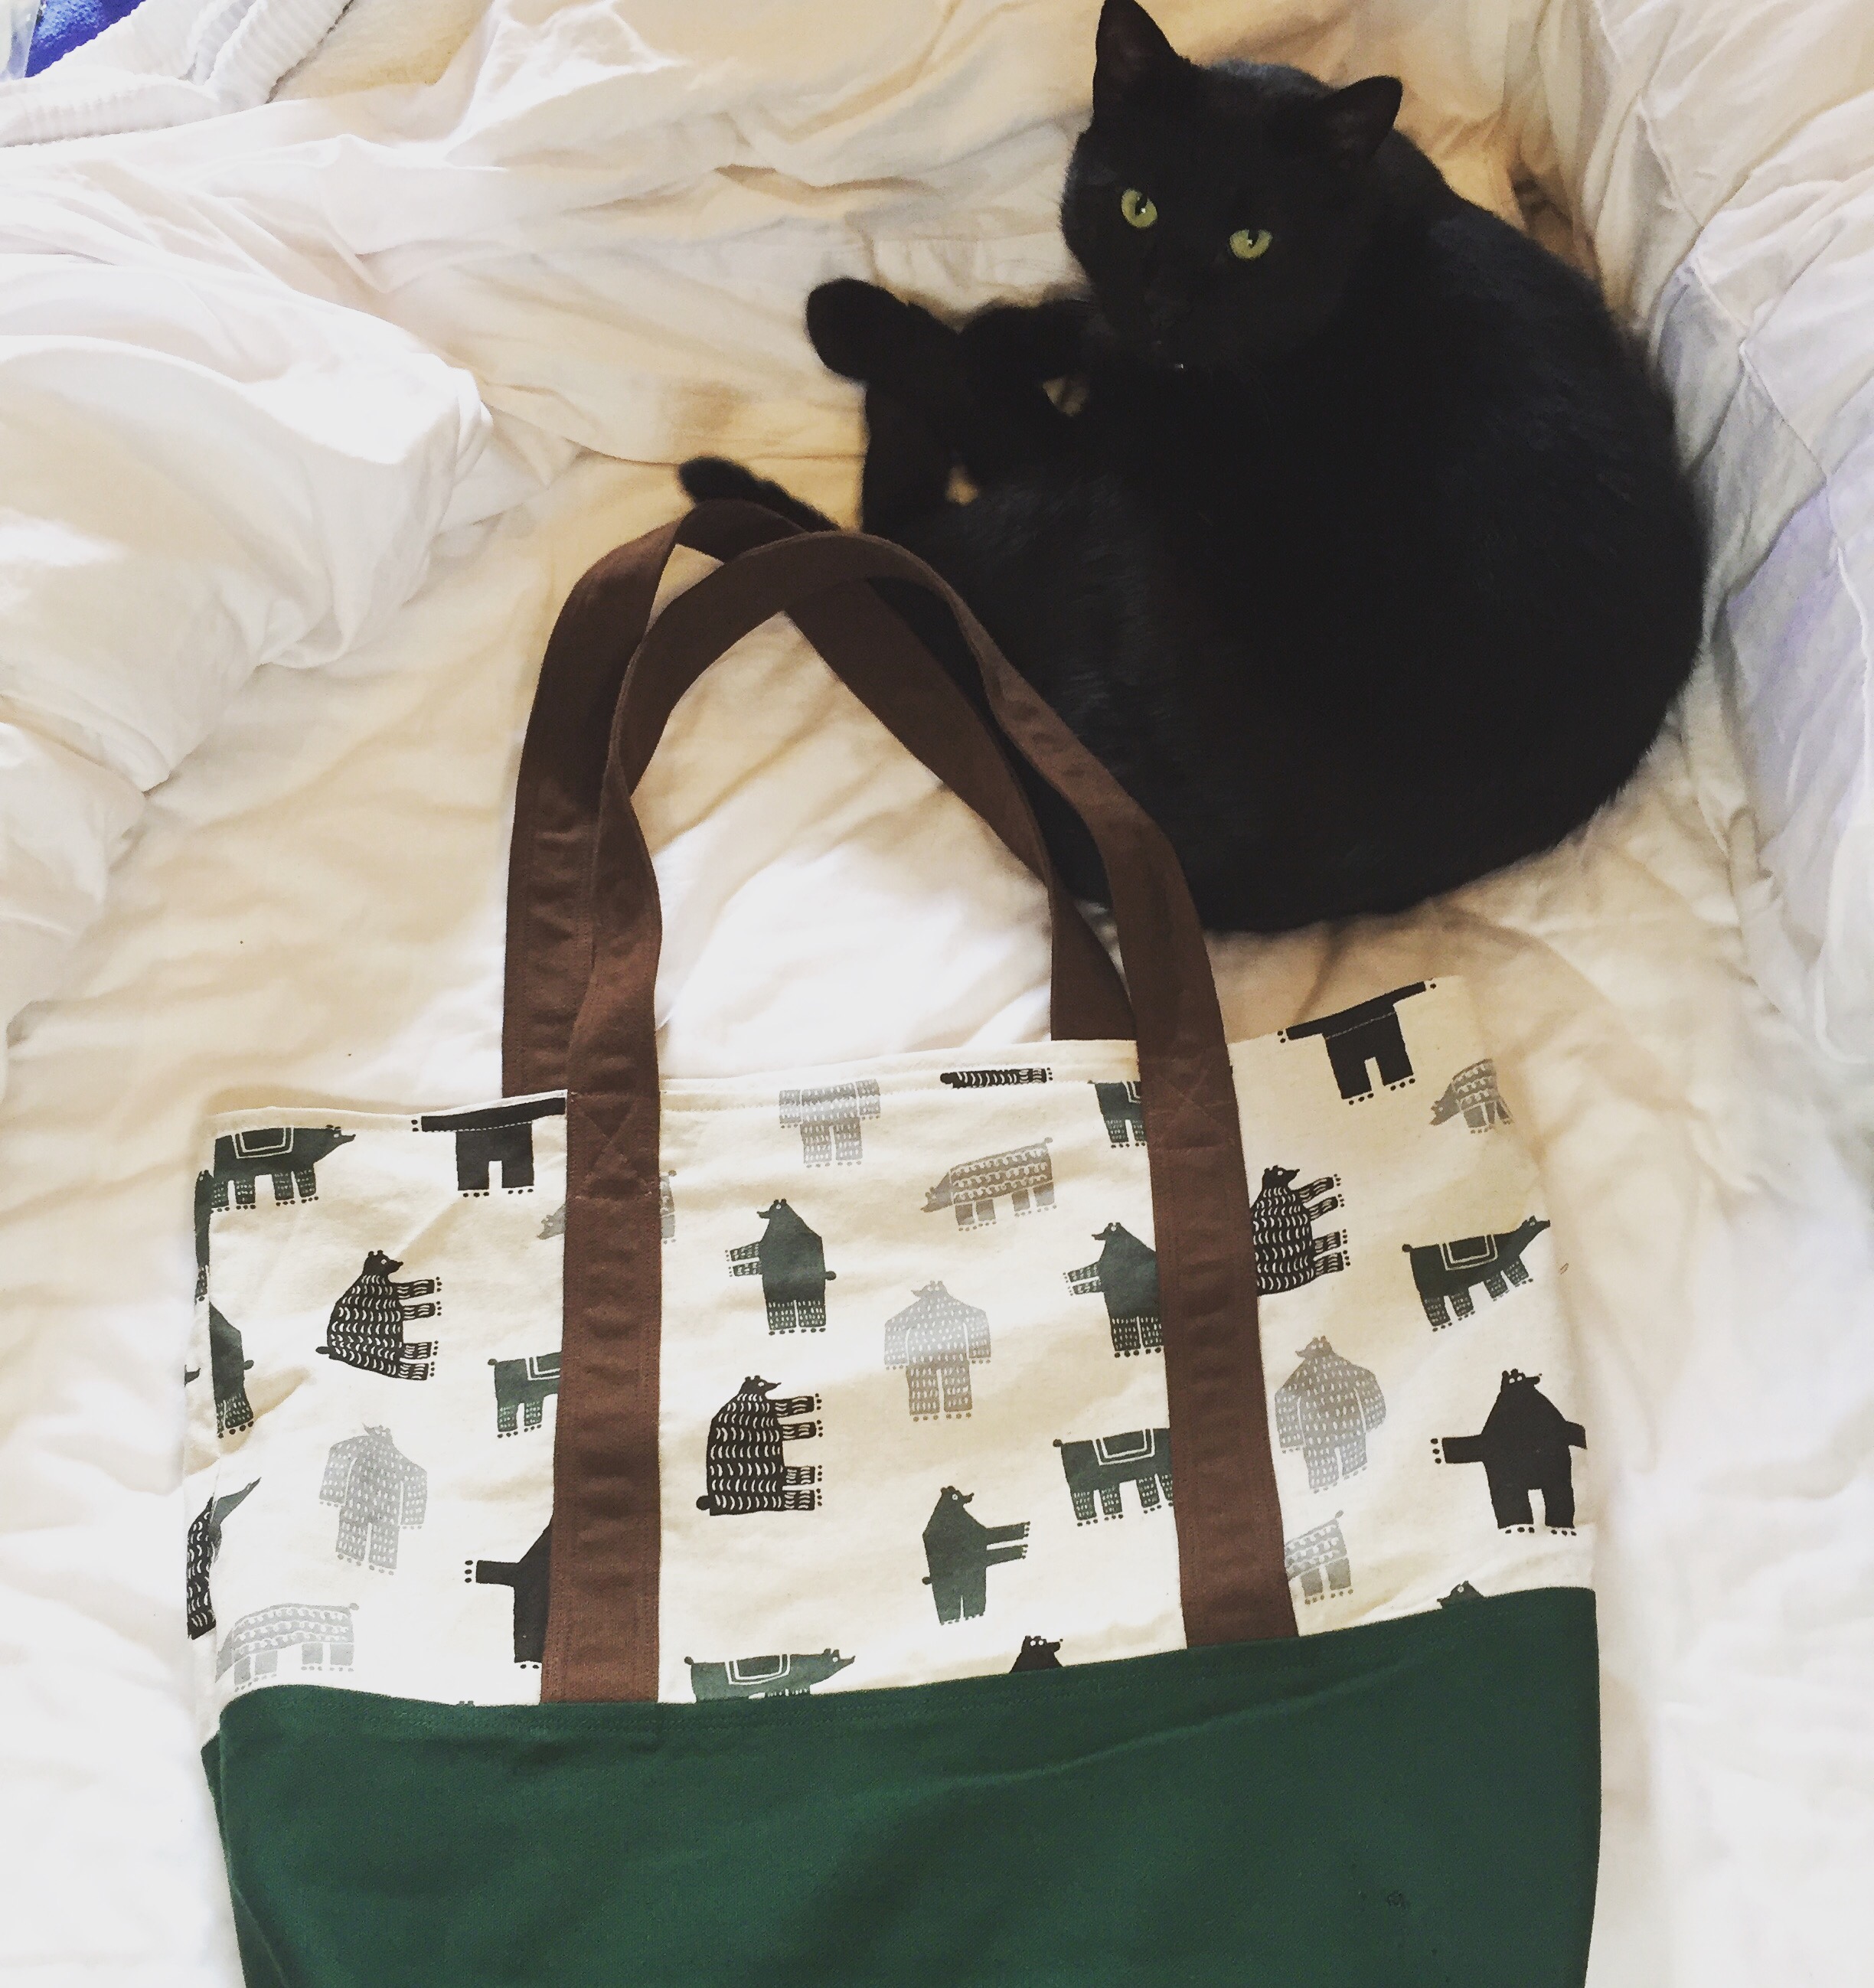
Our cat Bitey approves.


Swaying Palms Market Tote

Tommy Bahama swaying palms market tote
I never thought I’d get excited about a tote bag, but this project has turned out to be one of my most satisfying makes so far.

Near our family holiday house in Cazadero, California

I had a great time in California at the end of July/early August, when I visited my parents at our holiday house in the Sonoma County Redwood forest. I spent two weeks picking wild blackberries, lazing by the creek, sightseeing with my parents, and drinking (guzzling?) local Russian River Valley wines. All of the wining and dining was generously sponsored by my parents, so I wanted to make them something to say thanks.

I’ve seen the main fabric around the internet a couple times, and from the first time  I saw it I immediately thought of them. I was so happy to hunt it down, because I think they’ll love it. I knew I wanted to make them a bag with it, but it took me a long time to settle on a pattern. I wanted something useful and fairly gender neutral (my mother isn’t very feminine, and my father definitely isn’t a macho type either). I wanted to make a bag that they could pack a picnic in, or take to the hotel pool when they’re travelling. My first preference was to buy a pattern (save me having to measure stuff out myself) but ultimately I couldn’t find anything that seemed right.

Eventually, I stumbled upon this tutorial. It wasn’t everything I was looking for, but it was pretty close, and the instructions were really good. I used this as a jumping off point, and modified it to get what I wanted.

Construction in progress.

The base and main body dimensions are the same as the tutorial. The most obvious deviation from the original is that I cut the straps 12 inches longer (but 11 might have been better) and sandwiched them between the base and the main body, rather than the main body and the lining. I stitched along the straps up the body to secure them, stopping 1 1/2 inches from the top. 

Then, once the lining was attached and the whole thing was turned out the right way, I stitched a 1″ box with an X through each strap to secure it. In both this stitching, and the top stitching along the edge of the bag, I used white thread in the bobbin to match the lining and make the stitching less obvious on the inside.

Inside of the bag, with the pocket and label sewn into the lining.

Another change I made was to add an interior zipped pocket, according to this tutorial, on one of the lining pieces (before assembling the lining). I stitched the pocket to the lining for extra strength, using matching thread.

I also added one of my new custom labels. I ordered them from Nominette after reading a review on a sewing blog. I don’t remember which blog it was now, although I’ve since seen them reviewed on another blog or two. Good marketing. For what it’s worth, I’m very happy with them– although they’re a little more plasticky-feeling than I’d hoped, I still think they’d be comfortable in garments (hopefully I’ll test this out soon!). I paid €44.50 for 100 woven labels (this is the minimum order), including shipping to Korea, and they were mailed out really quickly. There’s a pricier custom logo option, but these are just the basic ones.

IMG_2041

Nothing I make can go in the dryer. I don’t own one, so nothing has been pre-shrunk. It’s for the best anyways– kinder to the clothes, and the environment!

Once I’d drawn up all the pattern pieces, and figured out what I was doing, the construction of this bag went very smoothly. I zigzagged all the raw edges, and skipped the interfacing, because the tutorial was made for quilting cottons. With the fabrics I used, extra strength wasn’t necessary. Interfacing would have given the bag more structure, but I like the soft-and-floppiness of this bag. Makes it easier to shove it into other bags when travelling. I tried adding a line of stitching on the inside to give the base sharper edges– you can see this on the picture below– but with the floppiness, it didn’t really have much effect, and I’ll skip it next time. 

Here you can faintly see the chalk from when I marked the stitch lines on the straps– it’s been rubbed off now and isn’t visible.

I deliberated over whether I wanted to use green or brown for the base, and ordered both out of indecision. The helpful advice I got on Instagram and from friends was to use the green. I eventually decided to cut the straps out of the brown fabric– I’m extremely pleased with how this worked out.

Here are the fabrics I used:

Base: 7 oz. cotton duck, hunter green. From fabric.com, available here.

Main: Tommy Bahama Swaying Palms Aloe polyester home dec fabric, from fabric.com, available here.

Straps: Pre-shrunk 9 oz. cotton duck, potting soil brown. From fabric.com, available here.

Lining and pocket: Unbleached cotton from Dongdaemun market in Seoul. It’s thicker and tougher than a quilting cotton, I think it might be a lightweight canvas?

The main, base and strap fabrics all advised against washing in the care instructions, so I didn’t pre-wash them. However, when I went to iron the green base fabric, it yellowed where I sprayed it with water, and seemed to smoke under the iron. This worried me, because a tote bag which can’t get wet would be a silly thing indeed, and it needed to be ironed before cutting. So, I soaked the fabric in some water, and hung it up to dry. This left it rather wrinkled, but also made it feel a lot more cotton-y. Prior to this, it had actually felt rather synthetic. I prefer the less smooth, more natural look it has now. It also no longer smoked under the iron after this soaking– wonder if it had been treated with something? Either way, although the instructions said dry clean only, soaking it changed it but didn’t ruin it.

IMG_2076

The bag on an outing, with my most recent Southport dress.

I will finish up here with a confession: I love this bag so much, that after taking it for a test drive, I claimed it for myself. I’d originally thought I wouldn’t want it, because the fabric isn’t typically my style, but it’s really grown on me. However, lest I seem excessively selfish, I do have some excuses for taking this one as mine. There was enough fabric left over for an identical bag, and that bag is now almost done. I’d hoped that the second go round there would be fewer flaws, and so far it does seem better. Hopefully my parents’ bag will be on its way to them soon– in the meantime, I am thoroughly enjoying mine. I’ve used it almost every day since it was made!

The bag in action. Child for scale.