Busting out of my sewing slump! This here is the Southport Dress by True Bias. I originally picked up this pattern after a fitting fail with the By Hand London Kim dress– I had a trip to California rapidly approaching, and I really needed a win. This casual, summery, and loosely fitted dress seemed perfect.
So I taped together a copy of the pdf and cut it out in the size 18. That’s a 44.5″ bust, on the size chart, but there’s plenty of ease included so I was pretty confident it would fit around my 46″ chest. And it did. That wasn’t the problem…. those armholes! Gap city. There was some serious gaping going on…. to my dismay, and despite the gazillion people on the internet who’ve whipped this up without problems, it was quickly apparent that this would not be the easy success I’d been hoping for. After a few attempts to bring this unruly project to order, I ended up chucking it aside in a huff and abandoning it until after my vacation.
Fortunately, once I got back, I was able to get it sorted, with some advice from some helpful sewists on the Curvy Sewing Collective forum. Someone pointed out that the issue could be related to my height– I’m a bit under 5’3– and perhaps I need a petite adjustment. That gave me the idea to cut a smaller size at the shoulders, which seemed to be the key. I won’t bore you with the gazillion specific steps between disaster and success, and just tell you how I got this pattern to work for me in the end. Here are my fitting alterations:
–Cut a size 14 shoulders/neckline, and a size 16 everywhere else. The 14 meets the 16 at the side of the armholes.
–Did a 1.5″ full bust adjustment (fba) for a total of 3″ added to the bust
–Split the now-too-large-and-pointy bust dart into two smaller darts, according to this handy tutorial. It’s for a waist dart, but the principle is the same.
–Added a waist dart to remove the width added by the fba to the waistline
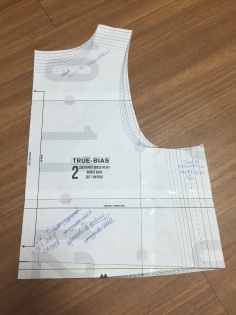
-Trimmed the back bodice piece so that the waistline is a straight right angle to the center back, to remove some excess length that was causing a bit off puffiness on the back. In the picture below, I cut along the yellow highlighted line.
— Removed the button band, because I don’t know how to do buttonholes nobody got time for that.
–Shortened the skirt by 1″ along the lengthen/shorten line, because I’m short and was trying to skimp on fabric.
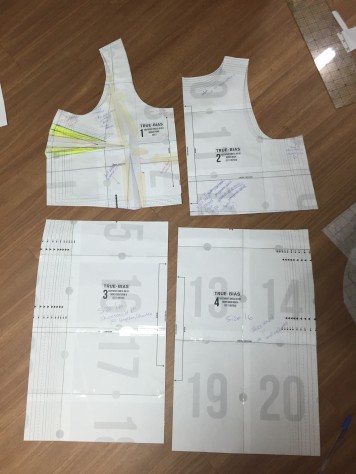
Here’s what this little pattern monster looked like when I was through with it:
After all that, I decided to make a wearable muslin, but the seersucker fabric I was using turned out not to be entirely cotton when my iron melted a hole in the bodice as I tried to iron down the darts. Gah. Oh well, I didn’t like the fabric much anyways– it looked disturbingly like my high school uniform. I never would have actually worn it, so making it up properly would have been a waste of time– and at least it showed me that I finally had a decent fit!
Next time round, I dived in to making up a proper dress in Liberty Tana Lawn. Most expensive fabric I’ve ever sewn with, although the price definitely could have been worse– I bought mine online from an amazing British store called Shaukat. That store is amazing, so many Liberty prints at seriously discounted prices. Mine was only 14.25 pounds (Err…. how do I do a pounds symbol??) per meter!!! Here’s a link to the fabric, it’s still available. Given the prices that Liberty lawn usually sells for, I will definitely be going back to buy more from this store. Don’t let the dodgy, faded pics fool you– the colors are vibrant, this fabric is the real deal. I won’t rant on about how much I love Liberty lawn, because that topic has been well covered by other sewing enthusiasts. But know that it is PERFECT for the Southport Dress, and I’ve already started cutting out another Liberty Southport.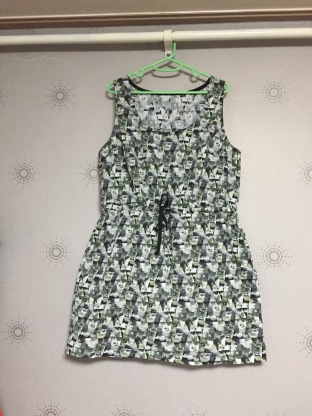
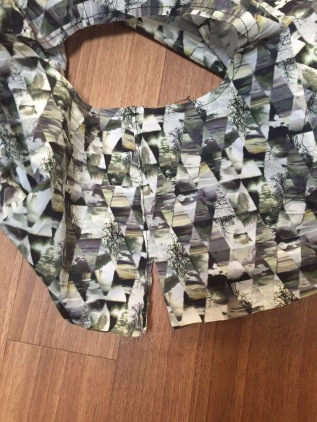
Construction was going very smoothly, until I totally screwed up my attempt at french seams. The shoulders were fine, but when I got to the bodice side seams, it all went wrong– First, on one side I trimmed off the part I was supposed to topstitch down. Then on the other side, when trimming the part that was actually supposed to be trimmed, I accidentally snipped into the bodice itself…. witness the horrors:
So, I took some deep breaths, went to find a drink (But just one! Alcohol and sewing don’t go particularly well together), came back and unpicked everything then took it in to cover my mistakes. Fortunately, the damage was done close to the seams. I trimmed the sides, then sewed them back up with a mere 1/8″ seam allowance (and abandoned any attempts at french seaming). This little detour shrunk the bodice by 1/8″ on each front side, and 3/8″ on each back side. The end result is a bit snugger than I’d like, but luckily still looks fine! I’m interested to see how sewing it up correctly on the next one will affect the fit.
After that little sewing horror story, everything else was fine. I used store bought black bias tape for the drawstring, neckline and armscyes (and discovered that I’ve been using bias tape wrong…) and black cotton lining for the pockets.
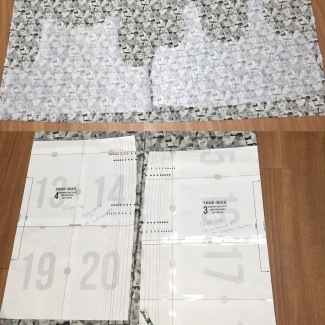
I used a different fabric on the pockets to save fabric. Actually, when I cut the pattern out, I used full-sized traced copies of the bodice pattern, so that I wouldn’t have to cut it on the fold– in this way, I was just able to squeeze the front and back bodice alongside each other. And I seriously mean JUST. One size bigger, and they wouldn’t have fit. And likewise with the skirt pieces– I squished them in alongside each other, but one size bigger and it wouldn’t have worked. This made a HUGE difference in how much fabric I used– in the end, I only used 110 cm of this 135 cm wide fabric. Take a look at this seriously strategic pattern placement:
I think that’s what I’m most proud of for this dress.
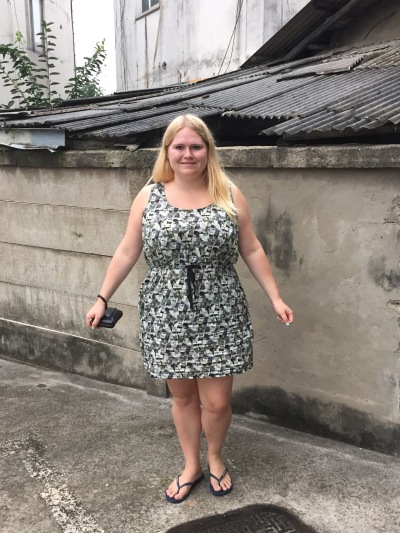
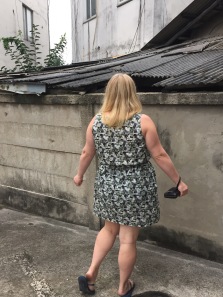
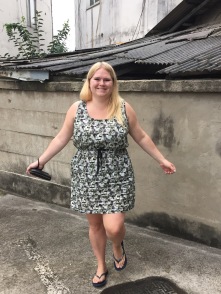
I wore this dress all day today– it was really comfortable, perfect or the summer heat. The only problems are that it pulls a bit across my chest when I move (obviously my unintentional alteration is to blame there), and is a bit too short (also my fault, because I did shorten the skirt by 1″). I think next time, rather than lengthening the skirt back down to the original length, I’ll just use a narrower hem. I’m debating whether to re-do the hem on this one but…. eh. I’ll probably leave it. Overall, I love my new dress!

Love the dress. It’s too bad it’s tight, but it looks fabulous and it got you out of your sewing slump! That fabric is amazing. 🙂
LikeLike
Thanks! It’s only a tiny bit tight, fortunately, still totally fine to wear! And if I can undo the damage of a bottle of wine a day for two weeks on my California trip, that will help 😉
LikeLike
My dry cleaner says that white wine will get rid of red wine stains, but I’ve never tried it.
LikeLike
Wow that’s a good tip! Hehe but I meant more the damage to my waistline
LikeLiked by 1 person
(Fortunately I’m a white wine drinker, much safer in terms of stains!)
LikeLiked by 1 person
Such a super cute dress! Love it and glad it took you out of your sewing slump!
LikeLike
Thank you!! It definitely did, I’ve now made three dresses in the past two weeks 😀
LikeLiked by 1 person
I’ve got to second you on Shaukat. I’ve sent a friend (visiting London for work) there for some fabric for me and my MIL (who lives in UK) picked up a few yards on another trip. So I’ve scored many yards of Liberty for a very good price. Now I need to get up the courage to use it! I think they do ship to the US but once you add on shipping it’s about the same as US sources.
Cute dress!!
LikeLike
Wow, that’s great you could have someone pick it up for you! I live in Korea and I get most of my fabric from overseas because quality here is unreliable and tastes are different (super feminine delicate florals etc… Not my style). Shaukat’s fees are no worse than shipping from America.
Worst fees I’ve come across was Vlisco– they wanted to charge me SIXTY EUROS for shipping 4 yards of fabric! And yet shipping to America would only cost eleven euros! How on earth does that add up. Fortunately I had a Dutch friend coming to visit me, so he could bring it 😀 but anyways, shipping fees are the bane of my sewing existence!
LikeLike
Pingback: Volcanism Southport | Stitchy Squirrel